Remove the nut (Item 1) [Figure 20-40-103] from the solenoid stem.
Installation: Tighten the nut to 53 in.-lb. (6 N•m) torque.
Remove the solenoid coil (Item 2) [Figure 20-40-103].
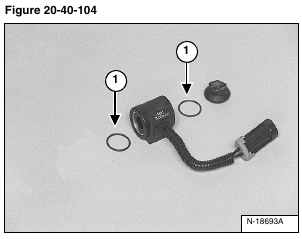
Remove the O-rings (Item 1) [Figure 20-40-104] from both ends of the solenoid coil.
Use an Ohm meter to measure the solenoid coil resistance.
The correct resistance for the coil is 9.79 ± 0.29 ohm.
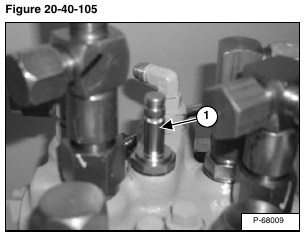
Remove the solenoid stem (Item 1) [Figure 20-40-105].
Installation: Lubricate the O-rings and tighten the stem to 20 – 24 ft.-lb. (27 – 33 N•m) torque.
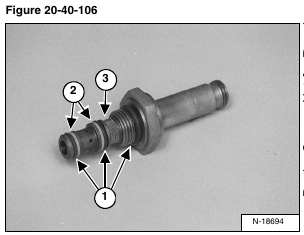
Remove the O-rings (Item 1) and back-up rings (Item 2) [Figure 20-40-106] from the cartridge.
Clean all parts in solvent and dry with compressed air.
Inspect all parts for wear and replace any showing excessive wear.
NOTE: The screen (Item 3) [Figure 20-40-106] may be cleaned with solvent. If it is torn or worn it needs to be replaced.
Use only new O-rings and apply oil to all O-rings and back-up rings before installation.
Install new O-rings (Item 1) [Figure 20-40-104] & [Figure 20-40-106] and new back-up rings (Item 2 [Figure 20-40-106] on the solenoid stem.


