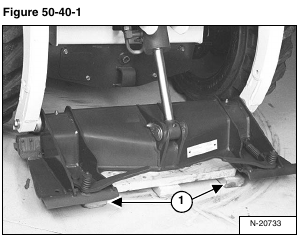
Tilt the Bob-Tach forward, so it is parallel to the floor. Put blocks (Item 1) [Figure 50-40-1] approximately 3 inches thick under each side of the Bob-Tach. Lower the Bob-Tach onto the blocks.
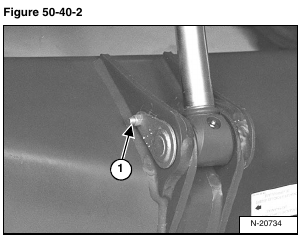
Remove the retainer bolt (Item 1) [Figure 50-40-2] from the pivot pin.
Installation: Tighten the retainer bolt to 25 – 28 ft.-lb. (34 – 38 N•m) torque.
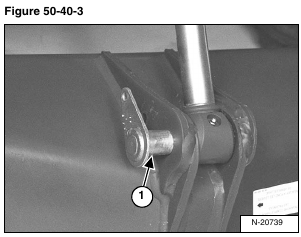
Remove the rod end pivot pin (Item 1) [Figure 50-40-3].
Remove the tilt cylinder rod end.
NOTE: Removal procedure is shown for the right side. Left side procedure is the same.
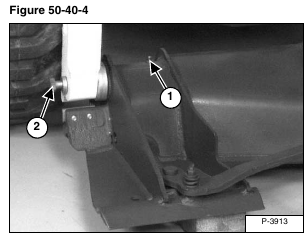
Remove the grease fitting (Item 1) [Figure 50-40-4] from the Bob-Tach frame for the pivot pin (both sides).
NOTE: The grease fitting (Item 1) [Figure 50-40-4] must be removed to prevent the pivot pin from being locked in the Bob-Tach frame.
Loosen the bolt (Item 2) [Figure 50-40-4] at the Bob-Tach pivot pin.
Strike the head of the bolt (Item 2) [Figure 50-40-4] to push the pivot pin into the Bob-Tach frame.
Remove the bolt (Item 2) [Figure 50-40-4] and use a punch to push the pivot pin all the way into the Bob-Tach frame.
Installation: A longer bolt will be needed to temporarily reach through the lift arms into the pivot pins to seat them into the lift arms. Once seated, reinstall the original bolts.
Tighten the bolts to 190 ft.-lb. (258 N•m) torque.
NOTE: Use tapered ream MEL1233 to clean the tapered hole in the lift arms. The tapered hole must be clean and free of debris to provide a good contact surface for the pivot pin.
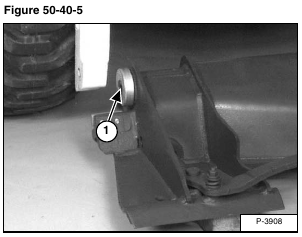
Slowly back the loader away to remove the Bob-Tach frame [Figure 50-40-5].
Remove the seal dust cup (Item 1) [Figure 50-40-5].
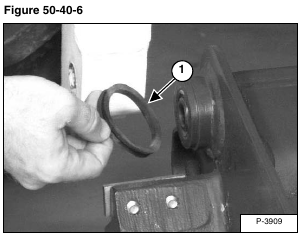
Remove the rubber seal (Item 1) [Figure 50-40-6].
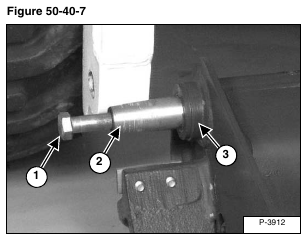
Install the Bob-Tach mounting bolt (Item 1) into the pivot pin (Item 2) [Figure 50-40-7]. Remove the pivot pin from the Bob-Tach frame.
Check for wear and damage. Replace the pivot pins as needed.
Installation: Push the pivot pin (Item 2) into the Bob-Tach frame. Position the end of the pin flush with the end of the Bob-Tach bushing (Item 3) [Figure 50-40-7].
Reverse the removal procedure to install the Bob-Tach.
