The compressor oil should be checked as follows when oil is being added to an in service excavator.
There is a close affinity between oil and refrigerant.
During normal operation, part of the oil circulates with the refrigerant in the system. When checking the amount of oil in the system or replacing any system component, the compressor must be run in advance to insure return of oil to the compressor.
If the amount of refrigerant in the system has decreased, charge the system. (See Reclamation And Charging With Recovery / Charging Unit on Page 70-40-3.)
Open the cab door and windows.
Run the blower at maximum speed.
Run the compressor for at least 20 minutes at 800 – 1200 rpm.
Remove the compressor from the excavator. (See Removal And Installation on Page 70-50-1.)
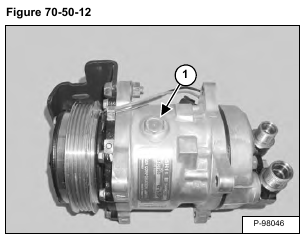
Remove the drain plug (Item 1) [Figure 70-50-12].
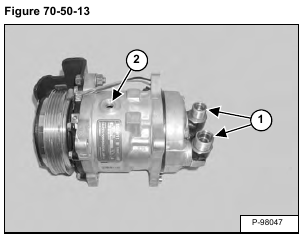
Drain the oil through the connectors (Item 1) and the oil drain hole (Item 2) [Figure 70-50-13].
Installation: Tighten the oil drain plug to 13 – 15 N•m (9.4 – 10.8 ft-lb) torque.
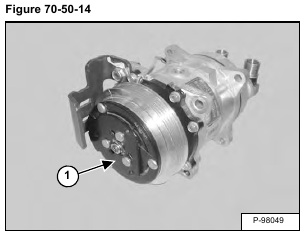
NOTE: After draining the oil through the drain hole and the connectors, extract the remaining oil through the discharge-side connector by rotating the drive pulley (Item 1) [Figure 70-50-14] several times by hand.
Measure the drained oil in a measuring cylinder.
Check the oil for contamination, dirt, metal shavings, or varnish color, discard the oil if contaminated.
NOTE: If metal shavings are found in the compressor oil, replace the complete compressor assembly.
Add new compressor oil through the suction side connector (Item 1) [Figure 70-50-15].
Installation: Add 150 – 170 cc’s of PAG 100 oil.
NOTE: The suction port on the compressor is marked with an S and is the larger port on the compressor.


