Lift and block the loader. (See LIFTING AND BLOCKING THE LOADER on Page 10-10-1.)
Raise the lift arms and install an approved lift arm support device. (See Installing Lift Arm Support Device
on Page 10-20-1.)
Raise the operator cab. (See Raising The Operator Cab on Page 10-30-1.)
Open the rear door.
Drain the hydraulic reservoir. (See Replacing Hydraulic Fluid on Page 10-120-3.)
Remove the engine speed control. (See Removal And Installation on Page 70-20-1.)
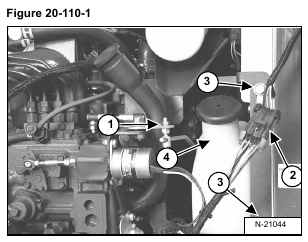
Remove the nut from the speed control linkage (Item 1) [Figure 20-110-1].
Unplug the rear lights electrical connector (Item 2) [Figure 20-110-1].
Remove the belt shield mounting bolts (Item 3) [Figure 20-110-1].
Remove the belt shield.
Remove the coolant recover tank and mount (Item 4) [Figure 20-110-1]
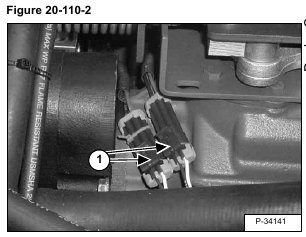
Disconnect the wire harness connectors (Item 1) [Figure 20-110-2].
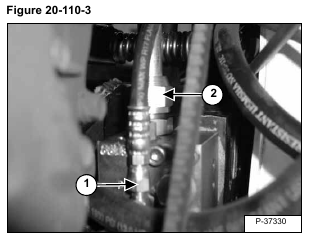
Disconnect the hose (Item 1) [Figure 20-110-3] from the “DR” port on the Power Bob-tach block.
Disconnect the outlet hose (Item 2) [Figure 20-110-3] from the top of the Power Bob-tach block.
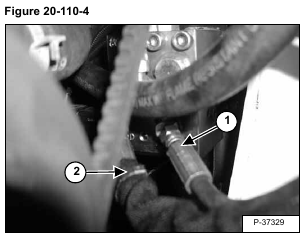
Disconnect the hose (Item 1) [Figure 20-110-4] from the “BASE” port on the Power Bob-tach block.
Disconnect the hose (Item 2) [Figure 20-110-4] from the “ROD” port on the Power Bob-tach block.
Remove the four mounting bolts (Item 1) [Figure 20-110-5] holding the Power Bob-tach block.
Installation: Replace the O-ring and tighten the mounting bolts (Item 1) [Figure 20-110-5] to 25-28 ft.-lbs. (34-38 Nm) torque.
Remove the Power Bob-tach block.


