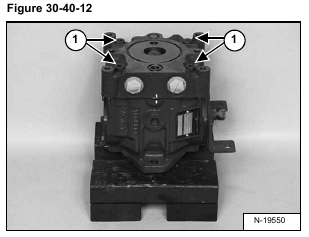
Remove the four bolts (Item 1) [Figure 30-40-12] from the pump housing end cap.
Remove the pump housing end cap (Item 1) [Figure 30-40-13].
Remove the gasket (Item 2) [Figure 30-40-13].
Remove the valve plate (Item 1) [Figure 30-40-14].
Check the valve plate for wear. (Both Sides.)
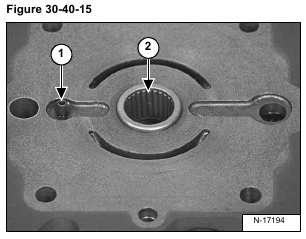
Check the valve plate locating pin (Item 1) [Figure 30-40-15] for wear and replace if needed.
Check the needle bearing (Item 2) [Figure 30-40-15] for wear and replace if needed.
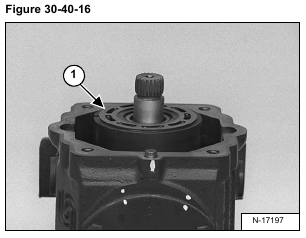
Remove the rotating group (Item 1) [Figure 30-40-16] from the pump.
Remove the slipper guide and pistons (Item 1) [Figure 30-40-17] from the cylinder block.
Check all the pistons (Item 2) [Figure 30-40-17] for wear and replace the rotating group as needed.
Remove the ball guide retainer (Item 1) [Figure 30-40-18] from the cylinder block.
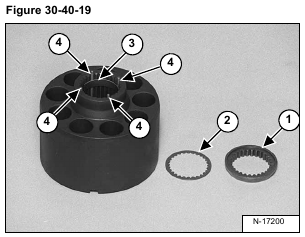
Check the ball guide retainer (Item 1) and washer (Item 2) [Figure 30-40-19] for wear and replace as needed.
Remove the pin retainer (Item 3) [Figure 30-40-19].
Remove the four pins (Item 4) [Figure 30-40-19] from the cylinder block.
Check the cylinder block for wear and replace as needed.
Check pins (Item 4) [Figure 30-40-19] to see if they are all the same length.
Remove the thrust plate (Item 1) [Figure 30-40-20] from the pump housing.
Remove the driveshaft key (Item 1), snap ring (Item 2) and support washer (Item 3) [Figure 30-40-21] from the
drive shaft end of the pump.
Use a seal puller and remove the seal (Item 1) [Figure 30-40-22] from the pump housing.
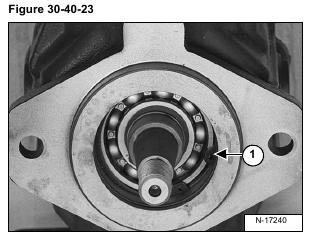
Remove the snap ring (Item 1) [Figure 30-40-23] from the pump housing and remove the driveshaft and bearing
from the housing.
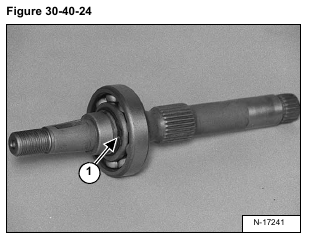
Remove the snap ring (Item 1) [Figure 30-40-24] from the driveshaft and remove the bearing.
Check the bearing for wear and replace if worn.
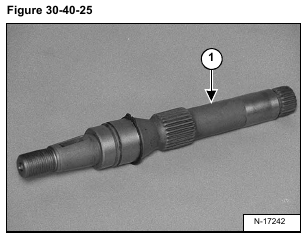
Check the pump shaft (Item 1) [Figure 30-40-25] for wear and replace if needed.
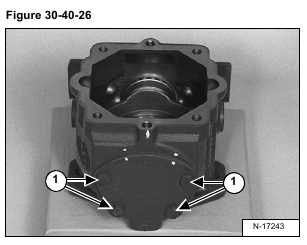
Remove the four mount bolts (Item 1) [Figure 30-40-26] from the lower trunnion cover. Remove the cover.
Remove the O-ring (Item 1) and bearing race (Item 2) [Figure 30-40-27] from the pump housing.
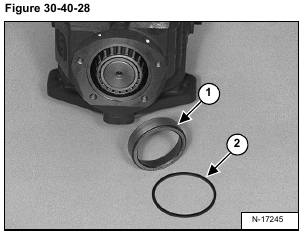
Check the bearing race (Item 1) and O-ring (Item 2) [Figure 30-40-28] for wear and replace as needed.
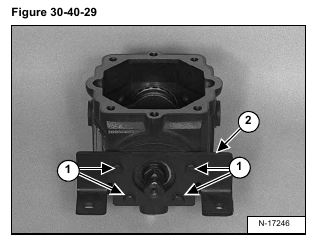
Remove the four mount bolts (Item 1) from the pump housing and remove the steering bracket (Item 2) [Figure
30-40-29].
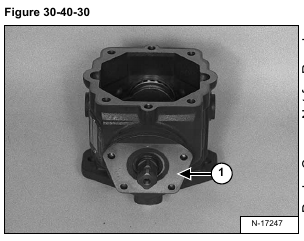
Remove the upper trunnion cover (Item 1) [Figure 30-40-30].
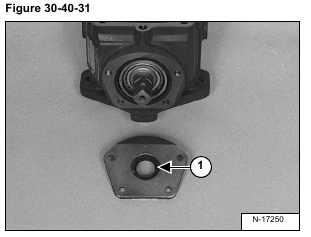
Inspect the seal (Item 1) [Figure 30-40-31] in the upper trunnion cover and replace if needed.
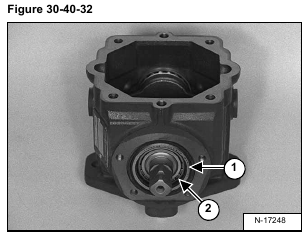
Remove the O-ring (Item 1) and bearing race (Item 2) [Figure 30-40-32] from the pump housing.
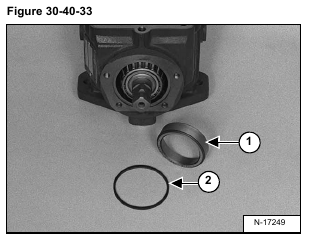
Inspect the bearing race (Item 1) and O-ring (Item 2) [Figure 30-40-33] and replace as needed.
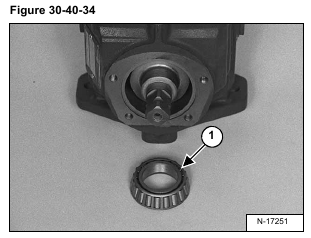
Slide the swashplate from side to side and remove the tapered roller bearing (Item 1) [Figure 30-40-34] from
the swashplate shaft.
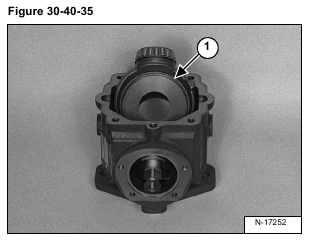
Tilt the swashplate (Item 1) [Figure 30-40-35] and remove the swashplate and lower bearing from the pump
housing.
