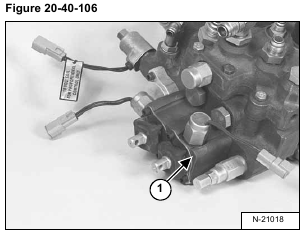
Remove the lift and tilt lock block (Item 1) [Figure 20-40-106] from the control valve. (See Lift And Tilt Lock Block
Removal And Installation on Page 20-40-22.)
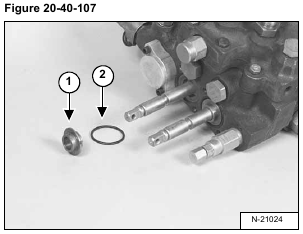
Remove the spacer (Item 1) and O-ring (Item 2) [Figure 20-40-107] from the tilt spool.
Remove the screws (Item 1) [Figure 20-40-108] from the end cap.
Installation: Tighten the bolt to 90-100 in.-lbs. (10,2-11,3 Nm) torque.
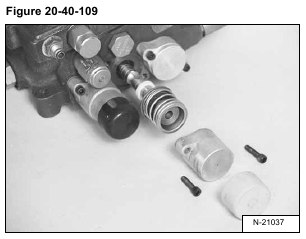
Remove the spool, centering spring, back-up washer and spool seal [Figure 20-40-109].
Assembly: Always use a new spool seal.
Put the linkage end of the spool in the vise [Figure 20-40-110].
Install the spring tool (Item 1) [Figure 20-40-110] over the centering spring.
Remove the bolt (Item 1) [Figure 20-40-111] holding the centering spring to the spool.
Installation: Tighten the bolt to 90-100 in.-lbs. (10,2-11,3 Nm) torque.
Remove spring tool from the spring assembly.
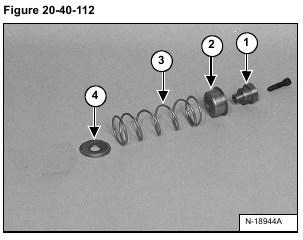
Inspect the adapter (Item 1), collar (Item 2), spring (Item 3) and washer (Item 4) [Figure 20-40-112].
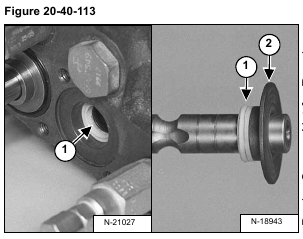
Remove the spool seal(s) (Item 1) and the back-up washer (Item 2) [Figure 20-40-113].
Assembly: Always use a new spool seal.
