Remove the hydraulic control valve. (See BICSTM Valve, Removal And Installation on Page 20-41-9.)
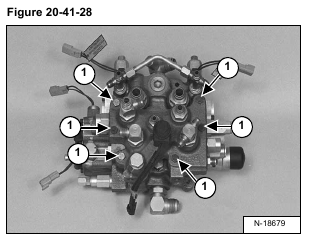
To remove the BICSTM from the control valve loosen and remove the six mounting bolts (Item 1) [Figure 20-41-28].
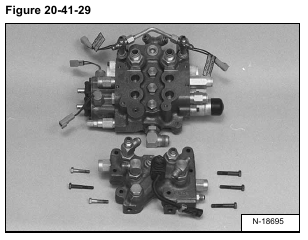
Remove the BICSTM valve assembly from the top of the control valve [Figure 20-41-29].
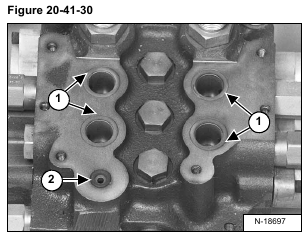
Remove the four large O-rings (Item 1) and the small O-ring (Item 2) [Figure 20-41-30] from the top of the control
valve.
Installation: Install the four new large O-rings (Item 1) and the new small O-ring (Item 2) [Figure 20-41-30] on
the top of the control valve.
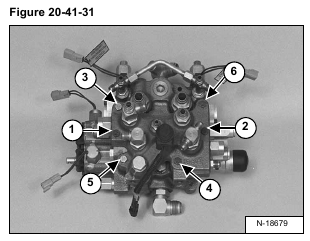
Install the six mounting bolts [Figure 20-41-31].
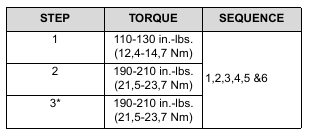
The chart below lists the correct torque specifications and tightening sequence when reinstalling the BICSTM]
valve assembly to the control valve. Thoroughly clean and dry bolts and threads in valve. Use liquid adhesive
LOCTITE #242 or equivalent.
*Torque must be 190-210 in.-lbs. (21,5-23,7 Nm) for every bolt or repeat step 3.
