The tool listed will be needed to do the following procedure:
MEL 1285 – Spring Tool
Remove the end cap block from the control valve.
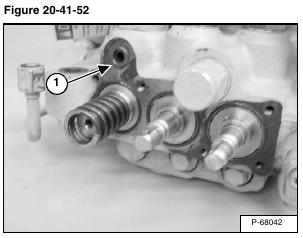
Remove the O-ring (Item 1) [Figure 20-41-52].
Installation: Replace the O-ring, and lubricate lightly with oil before installation of the end cap block.
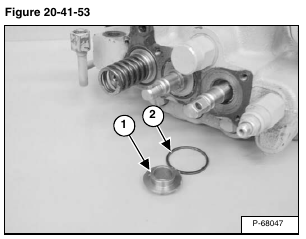
Remove the spacer (Item 1) and O-ring (Item 2) [Figure 20-41-53] from the lift spool.
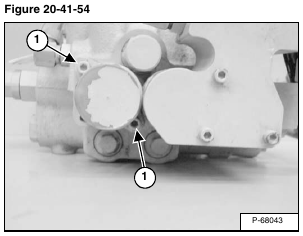
Remove the two screws (Item 1) [Figure 20-41-54] from the lift spool end cap.
Installation: Lubricate the screws and tighten to 90 – 100 in.-lb. (10 – 11,3 N•m) torque.
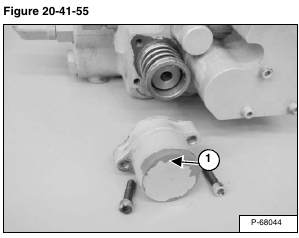
Remove the lift spool end cap (Item 1) [Figure 20-41-55] from the control valve.
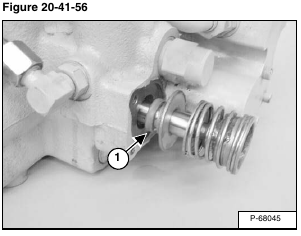
Remove the lift spool assembly and seal (Item 1) [Figure 20-41-56] from the control valve.
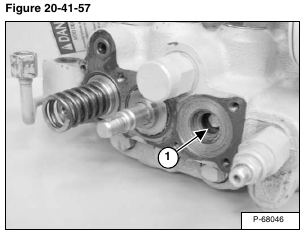
Remove the lift spool seal (Item 1) [Figure 20-41-57] from the linkage end of the valve.
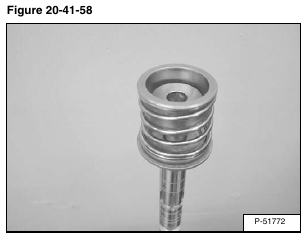
Clamp the linkage end of the spool in a vise [Figure 20-41-58].
NOTE: Protect spool before clamping in vise.
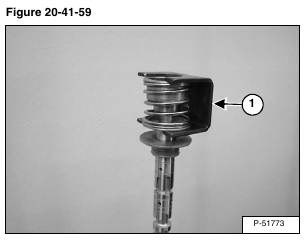
Install the spring tool (Item 1) [Figure 20-41-59] over the centering spring.
Remove the bolt (Item 1) [Figure 20-41-60] holding the centering spring to the spool.
Installation: Tighten the bolt to 90 – 100 in.-lb. (10,2 – 11,3 N•m) torque.
Remove spring tool from the spring assembly.
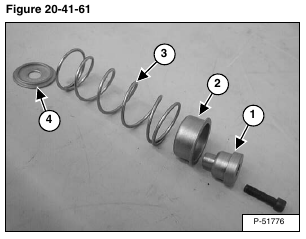
Inspect the adapter (Item 1), collar (Item 2), spring (Item 3) and washer (Item 4) [Figure 20-41-61].
Removal of the plastic plug:
Make a center point in the plug using a 1/16 in. drill.
Drill a hole all the way through the plug using a 7/64 in. tap drill
Turn a 6-32 tap (Item 1) [Figure 20-41-62] into the plug.
Pull the tap and plug out of the spool. Be careful, do not break the tap.
Clean all the debris from inside the spool bore.
NOTE: DO NOT USE Loctite® ON THE STUD THREADS.
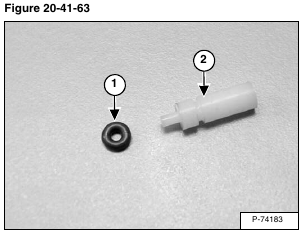
Install the O-ring (Item 1) over the nipple on the plastic plug (Item 2) [Figure 20-41-63].
NOTE: Check the O-ring for damage. The lift spool will have an internal leak if there is damage to this O-ring. Always replace the O-ring and recheck the lift spool before the control valve is replaced.
Install the plastic plug and O-ring in the spool [Figure 20-41-64].
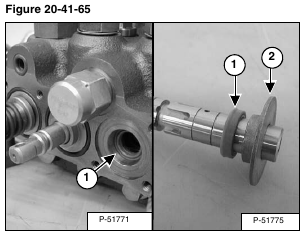
Remove the spool seal(s) (Item 1) and the back-up washer (Item 2) [Figure 20-41-65].
Installation: Always use a new spool seal.
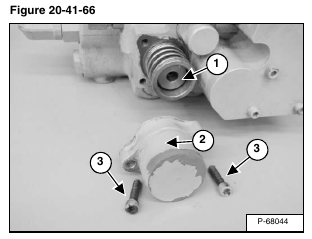
Install the lift spool assembly (Item 1) [Figure 20-41-66] in the spool bore.
Install the end cap (Item 2) [Figure 20-41-66].
Install the mounting screws (Item 3) [Figure 20-41-66].
Installation: Lubricate the screws and tighten to 90 – 100 in.-lb. (10 – 11,3 N•m) torque.
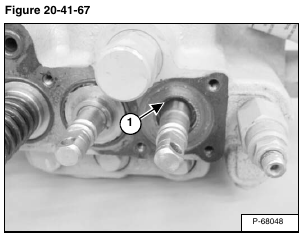
Install the spool seal (Item 1) [Figure 20-41-67] on the actuator end of the valve.
Install the O-ring (Item 1) and spacer (Item 2) [Figure 20-41-68] on the lift spool.
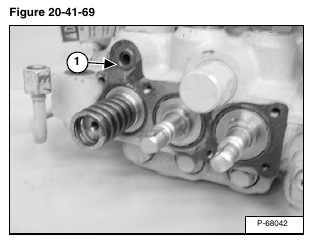
Install the O-ring (Item 1) [Figure 20-41-69] on the control valve.
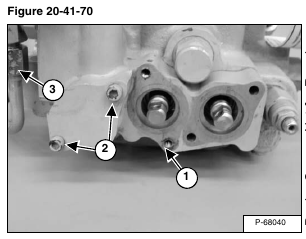
Install the end cap block (Item 1) and the two mount bolts (Item 2) [Figure 20-41-70].
Installation: Tighten the screws to 90 – 100 in.-lb. (10 – 11,3 N•m) torque.
Connect the tube line (Item 3) [Figure 20-41-70] to the end cap block.
Install the lift and tilt actuators to the control valve.
