Put jackstands under the rear corners of the loader.
Raise the lift arms and install an approved lift arm support device. (See Installing on Page 10-20-1.)
Raise the operator cab. (See Raising on Page 10-30-2.)
Drain the hydraulic reservoir. (See Removing And Replacing Hydraulic Fluid on Page 10-120-2.)
Disconnect the steering linkage from the hydrostatic pump.
Remove the battery from the loader. (See Removal And Installation on Page 60-20-1.)
Drain the engine coolant from the cooling system. (See Removing And Replacing Coolant on Page 10-90-2.)
Remove the air cleaner. (See Housing Removal And Installation on Page 70-40-1.)
Remove the muffler. (See Removal And Installation on Page 70-30-1.)
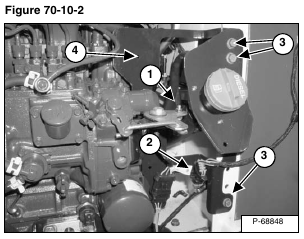
Remove the nut from the speed control linkage (Item 1) and unplug the rear door harness connector (Item 2) [Figure 70-10-2].
Remove the bracket mounting screws (Item 3) [Figure 70-10-2] so the belt shield (Item 4) can be removed.
Installation: Tighten screws and nut to 15 – 20 ft.-lb. (20 – 27 N•m) torque.
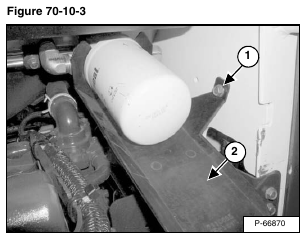
Remove the mounting screw (Item 1) to remove the oil filter drip shield (Item 2) [Figure 70-10-3].
The drip shield is snapped into place on the filter housing.
Installation: Tighten screw to 15 – 20 ft.-lb. (20 – 27 N•m) torque.
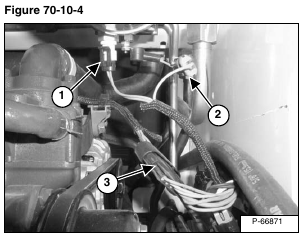
Disconnect the temperature sender connector (Item 1) [Figure 70-10-4] from the filter housing.
Disconnect the wire connector (Item 2) [Figure 70-10-4] for the differential pressure switch on the filter housing.
Disconnect the electrical connector (Item 3) [Figure 70-10-4].
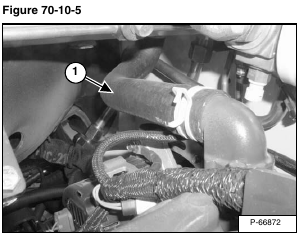
Disconnect radiator hose (Item 1) [Figure 70-10-5].
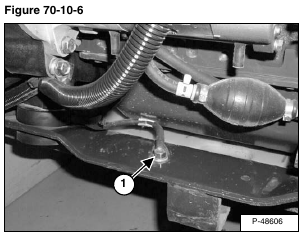
Disconnect the engine ground strap (Item 1) [Figure 70-10-6].
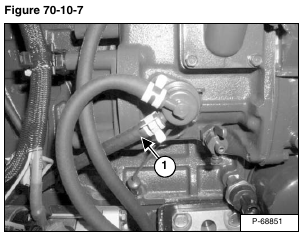
Disconnect fuel line (Item 1) [Figure 70-10-7] for lift pump.
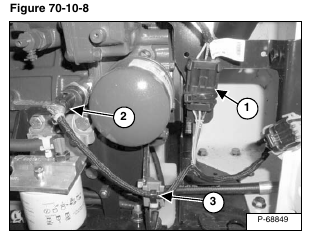
Disconnect fuel shutoff solenoid connector (Item 1) [Figure 70-10-8].
Disconnect engine oil pressure sender connector (Item 2) [Figure 70-10-8].
Cut tie-strap (Item 3) [Figure 70-10-8].
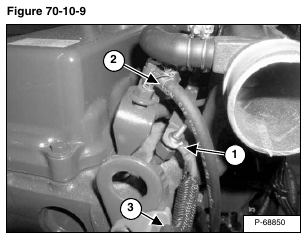
Disconnect glow plug wire (Item 1) [Figure 70-10-9].
Disconnect and plug fuel return line (Item 2) [Figure 70-10-9].
Remove the tie strap (Item 3) [Figure 70-10-9] from wiring harness clamp and move the wire harness to the left side of loader to allow clearance for engine removal.
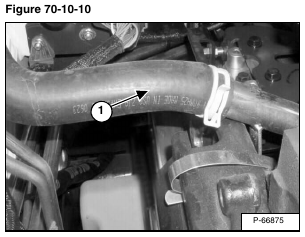
Disconnect engine coolant hose (Item 1) [Figure 70-10-10].
Cap or plug all hoses and fittings.
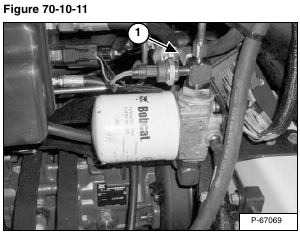
Mark and disconnect the charge pump filter outlet hose (Item 1) [Figure 70-10-11].
Cap or plug all hoses and fittings.
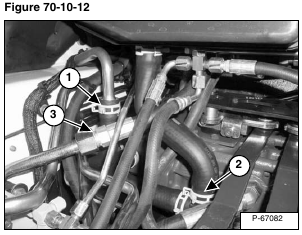
Disconnect gear pump inlet hose (Item 1) [Figure 70-10-12].
Disconnect supply hose (Item 2) [Figure 70-10-12] from hydraulic fluid reservoir.
Disconnect gear pump outlet hose (Item 3) [Figure 70-10-12].
Cap or plug all hoses and fittings.
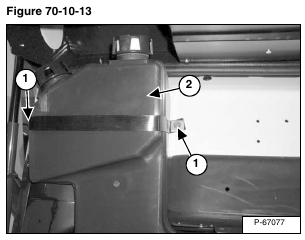
Remove the two bolts (Item 1) and move the hydraulic reservoir (Item 2) [Figure 70-10-13] out of the way.
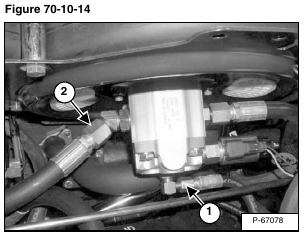
Disconnect drain hose (Item 1) [Figure 70-10-14] from the hydraulic cooling fan.
Mark and disconnect the hydraulic fan motor inlet hose (Item 1) [Figure 70-10-14].
Cap or plug all hoses and fittings.
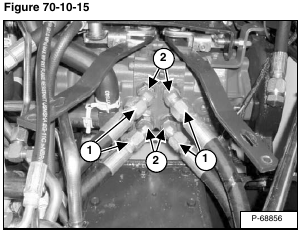
Mark and disconnect the drive motor hoses (Item 1) [Figure 70-10-15].
Cap or plug all hoses and fittings.
NOTE: Due to the left drive motor hoses orientation, hoses may not be completely removed from fittings until the engine and pump are partially removed.
Installation: Install the left drive motor hoses prior to alignment with engine mount bolts.
NOTE: The hydraulic fittings (Item 2) [Figure 70-10-15] on the hydrostatic pump must be tightened to 115 – 125 ft.-lb. (156 – 170 N•m) torque.
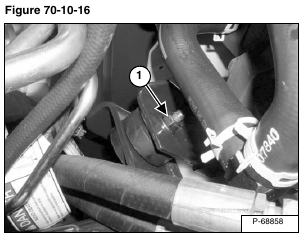
Remove the mounting bolt and nut (Item 1) [Figure 70-10-16] from the right front engine mount.
Installation: Tighten the mounting bolt to 70 ft.-lb. (95 N•m) torque.
Remove the mounting bolt (Item 1) [Figure 70-10-17] and nut from the left front engine mount.
Installation: Slide the engine mount slot (Item 2) [Figure 70-10-17] in between engine mount washer and nut.
Tighten the mounting bolt to 70 ft.-lb. (95 N•m) torque.
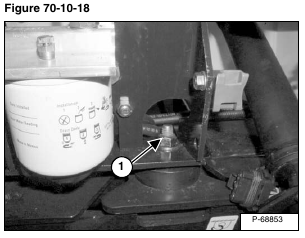
Remove the mounting bolt and nut (Item 1) [Figure 70-10-18] from the right rear engine mount.
Installation: Tighten the mounting bolt to 70 ft.-lb. (95 N•m) torque.
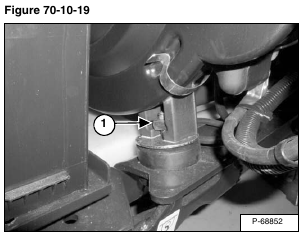
Remove the mounting bolt and nut (Item 1) [Figure 70-10-19] from the left rear engine mount.
Installation: Tighten the mounting bolt to 70 ft.-lb. (95 N•m) torque.
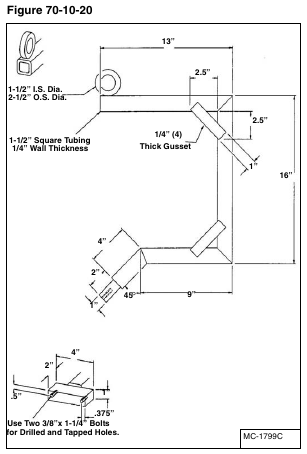
A tool needs to be fabricated to use in the removal procedure. This tool allows the engine/hydrostatic pump assembly to be lifted evenly for easier removal. Use the dimensions shown in [Figure 70-10-20] to make the engine removal tool.
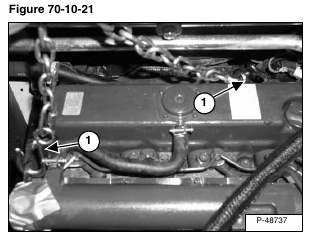
Fasten securely one end of the chain to the lifting eye (Item 1) [Figure 70-10-21].
NOTE: You may need to adjust the chain which fastens to the engine a couple of times to reach the correct lifting position.
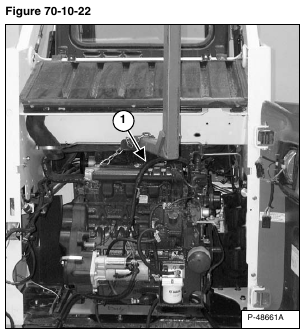
Install the chain hoist on the eyelet [Figure 70-10-22] of the removal tool.
Fasten a chain to other end of the removal tool with two bolts as shown in (Item 1) [Figure 70-10-22].
Remove the engine/hydrostatic pump assembly from the loader.
Reverse the removal procedure to install the engine.
