Remove the right handle. (See Handle Removal And Installation on Page 20-110-2.)
Clean the outside of the control lever before disassembly.
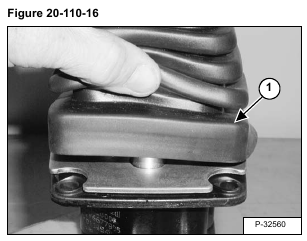
Remove the boot (Item 1) [Figure 20-110-16].
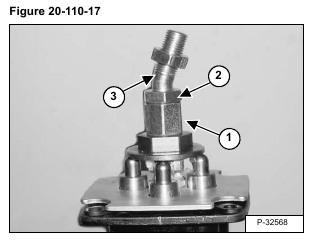
Mark the coupler (Item 1), nut (Item 2), and connector (Item 3) [Figure 20-110-17] for ease of assembly.
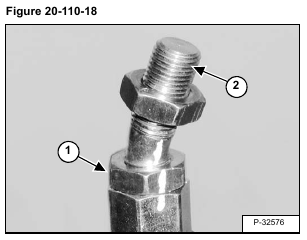
Loosen the nut (Item 1) and remove the connector (Item 2) [Figure 20-110-18].
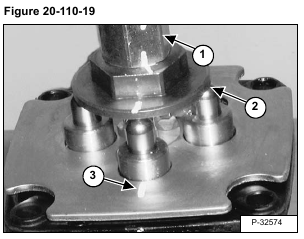
Mark the coupler (Item 1), control plate (Item 2), and plate (Item 3) [Figure 20-110-19] for ease of assembly.
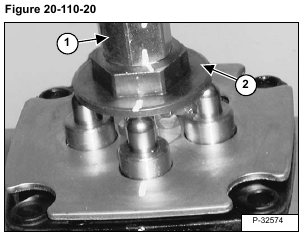
Remove the coupler (Item 1) from the control plate (Item 2) [Figure 20-110-20].
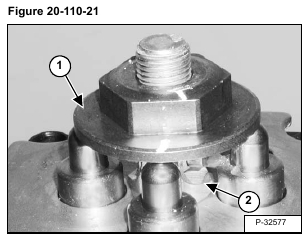
Remove the control plate (Item 1) from the U-Joint (Item 2) [Figure 20-110-21].
Mark the plate and housing for correct installation.
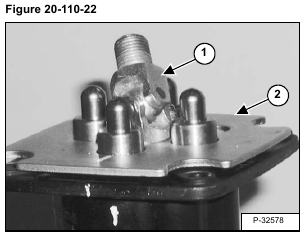
Remove the U-joint (Item 1) [Figure 20-110-22].
NOTE: The plate (Item 2) [Figure 20-110-22] is spring loaded and will come up as the U-joint is removed.
Remove the plate (Item 1) [Figure 20-110-23].
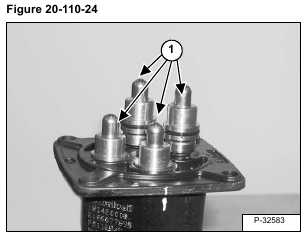
Remove the plunger assemblies (Item 1) [Figure 20-110-24].
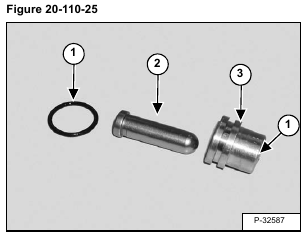
Remove the O-ring (Item 1) and plunger (Item 2) from the bushing (Item 3) [Figure 20-110-25].
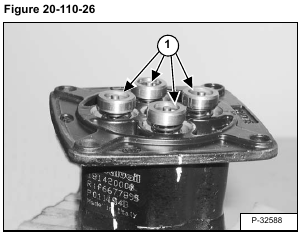
Remove the spool assemblies (Item 1) [Figure 20-110-26].
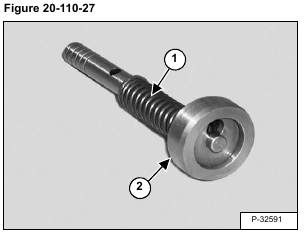
Compress the spring (Item 1) and remove the seat (Item 2) [Figure 20-110-27].
Remove the spring (Item 1) and shim (Item 2) from the spool (Item 3) [Figure 20-110-28].
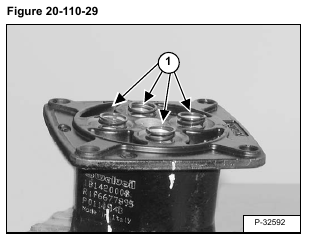
Remove the springs (Item 1) [Figure 20-110-29] from the housing.
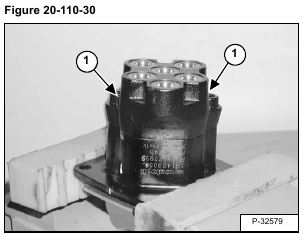
Clamp the housing in a vise that is equipped with padded jaws [Figure 20-110-30].
Remove the two bolts (Item 1) [Figure 20-110-30].
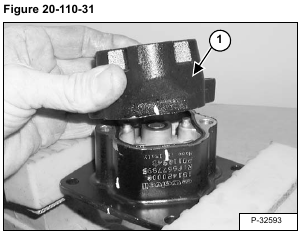
Remove the end cap (Item 1) [Figure 20-110-31].
Remove the O-ring (Item 1) and seal (Item 2) [Figure 20-110-32].
