Remove the piston and connecting rod assemblies. (See Piston And Connecting Rod Removal And Installation on Page 70-100-16.)
Remove the engine flywheel. (See Flywheel Removal And Installation on Page 70-90-1.)
Remove the bolts which fasten the bearing case cover to the block.
Installation: Tighten the bearing case cover bolts to 13-15 ft.-lbs. (18-21 Nm) torque.
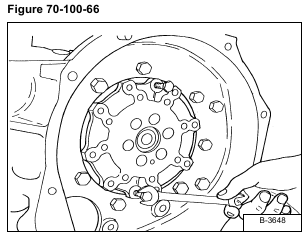
Install two bolts into the bearing case cover and pull the cover out [Figure 70-100-66].
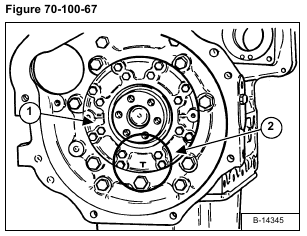
Installation: When installing the cover (Item 1), make sure the casting mark (Item 2) [Figure 70-100-67] is in the down position.
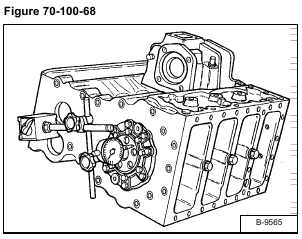
Before removing the crankshaft/main bearings, check the end play. Install a dial indicator. Measure the end play by moving the crankshaft back and forth [Figure 70-100-68].
If the measurement exceeds the allowable limit, replace the thrust washers.
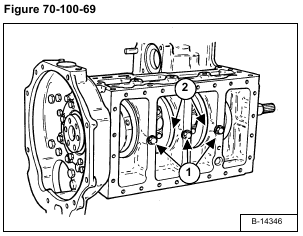
Remove the main bearing case bolt (Item 1) [Figure 70-100-69].
Installation: Make alignment of the bearing case hole (Item 2) [Figure 70-100-69] with the hole in the block.
Put oil on the bolt threads and tighten to 51-54 ft.-lbs. (69-73 Nm) torque.
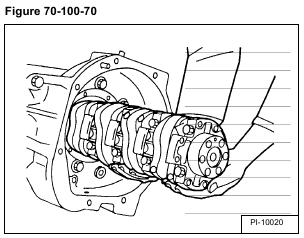
Remove the crankshaft/main bearing assembly from the engine block [Figure 70-100-70].
Mark the bearing case halves for correct installation.
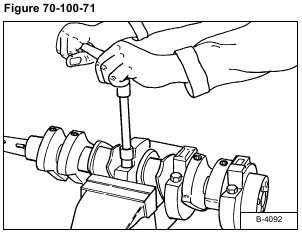
Remove the two bearing case bolts [Figure 70-100-71].
Remove the bearing case and bearing.
Installation: Tighten the bearing case bolts to 34-38 ft.- lbs. (46-52 Nm) torque.
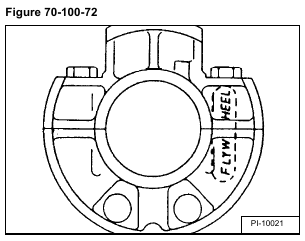
Installation: When installing the main bearing case assemblies, face the mark FLYWHEEL to the flywheel side of the engine block [Figure 70-100-72]. Be sure the thrust washers with its oil grooves face outward.
